
If you are an allergy parent, you probably know firsthand how stressful navigating social events can be. Not only do we have to pick and choose which events we attend based on how risky they may or may not be for our children, we are constantly on the lookout for allergens lurking behind every corner at said events, (even when an environment seems safe). Additionally, we need to bring safe foods everywhere we go (sometimes with little to no notice), and for most of us, picking up a cake or cupcakes from a bakery is not an option. Sometimes, even the events we most want to attend can become overwhelming.
It is for these reasons that I have decided to start creating allergy friendly cake decorating tutorials, with a focus on quick, and simple ways to make professional quality baked goods out of allergy friendly ingredients and materials. I hope that this will help you guys out the next time you find yourselves in need of a safe treat–whether you need something to bring with to a birthday party, or you just want to create something special for your kids.
For my first ever cupcake decorating tutorial, I will be showing you guys an easy way to make allergy friendly graduation themed cupcakes! I made these for my son’s kindergarten graduation, and they were a hit. They were also VERY easy to throw together. 🙂
Allergy Friendly Graduation Cupcakes
Materials and Ingredients:
-
- 24 Allergy Friendly Cupcakes (baked and cooled, but undecorated)
-
- 1 (16 oz.) container allergy friendly chocolate frosting (I used Pillsbury Creamy Supreme Milk Chocolate Frosting
—believe it or not, it’s dairy free! It does contain soy, though, so if soy is an issue for you, you will want to use a different brand)
- 1 (16 oz.) container allergy friendly chocolate frosting (I used Pillsbury Creamy Supreme Milk Chocolate Frosting
-
- 1 (16 oz.) container allergy friendly White or Vanilla Frosting (I used Pillsbury Creamy Supreme Classic White Frosting
–again, this does contain soy, so opt for a soy free brand if you are allergic to soy)
- 1 (16 oz.) container allergy friendly White or Vanilla Frosting (I used Pillsbury Creamy Supreme Classic White Frosting
-
- 2 cups Confectioners Sugar (optional)
-
- Decorating Bags (for piping icing)
-
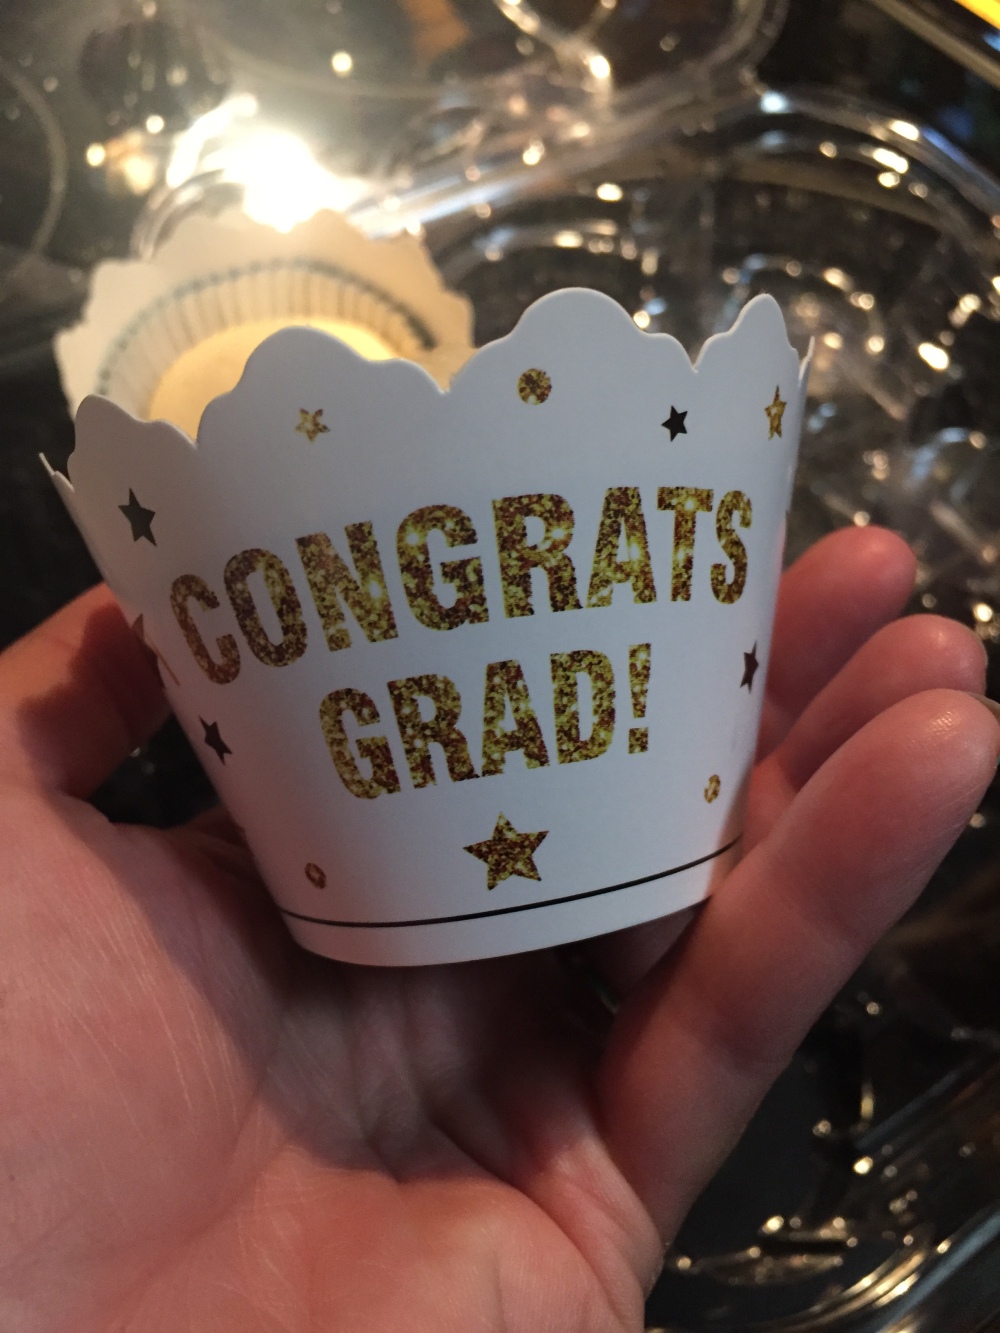
- Graduation themed Cupcake wrappers and toppers (I used these)
Directions:
1.) Since the focus of this post is on decorating these cupcakes, (and not on baking them) we will be starting with cupcakes that have already been baked and cooled. To make mine, I used two Betty Crocker Gluten Free Yellow Cake Mixes, but you could use any brand of cake mix, or make cupcakes from scratch using your favorite recipe. If using a cake mix, be sure to check out this post to learn how to make the most of it.

2.) Assemble the cupcake wrappers by slipping the tab on one end into the slit on the opposite end. Drop the cupcakes into the prepared wrappers so that the cupcake liner is completely concealed.


3.) Next, you will need to prepare your frosting. To frost these cupcakes, I used one container of Pillsbury Creamy Supreme Milk Chocolate Frosting and one container Pillsbury Creamy Supreme Classic White Frosting. As mentioned above, these frostings contain soy, but they are gluten free, and free of the remaining Top 8 Allergens. While tasty, these particular frostings do tend to be on the thin side. They can be piped onto cupcakes immediately upon opening, but you can drastically improve their texture and workability by adding a bit of confectioners sugar to them. This stiffens them up, and gives them a more professional look and taste. To do this, transfer your frosting to the bowl of a stand mixer, and add 1/2 cup of confectioners sugar. Beat on medium speed until the frosting is smooth. Add another half cup of confectioners sugar, and beat again until smooth. Repeat these steps with each frosting flavor, separately.
4.) Fit a decorating bag with either a 1M or 2D decorating tip (I used a 1M), and fill the bag with chocolate frosting. Fit a second decorating bag with another tip (again, 1M or 2D), and fill with white frosting.
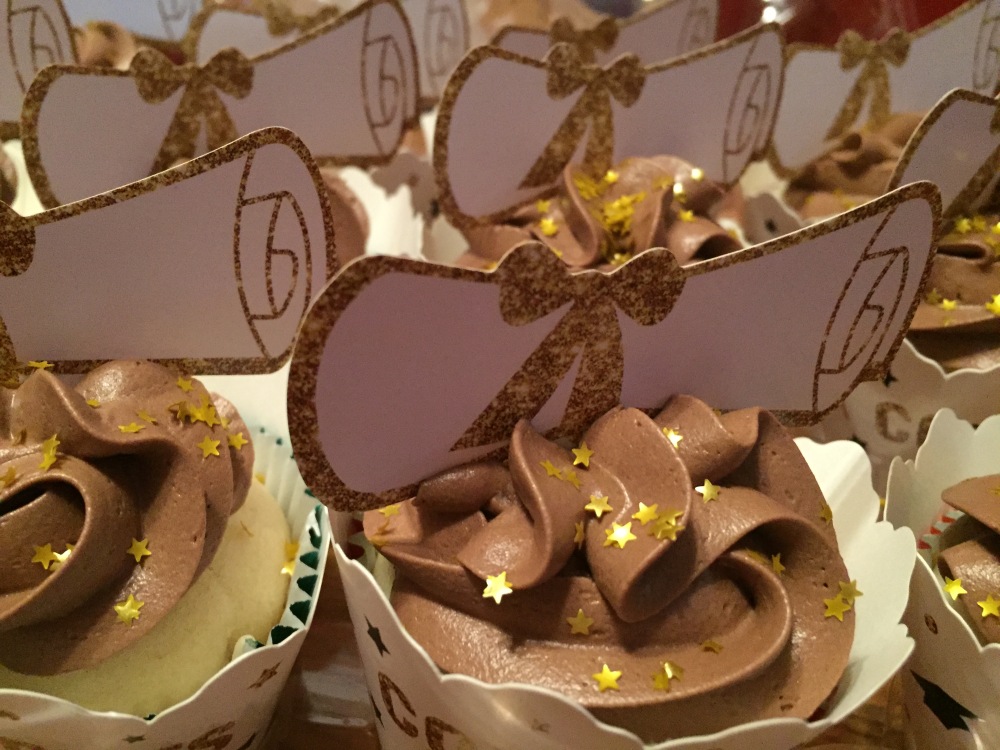
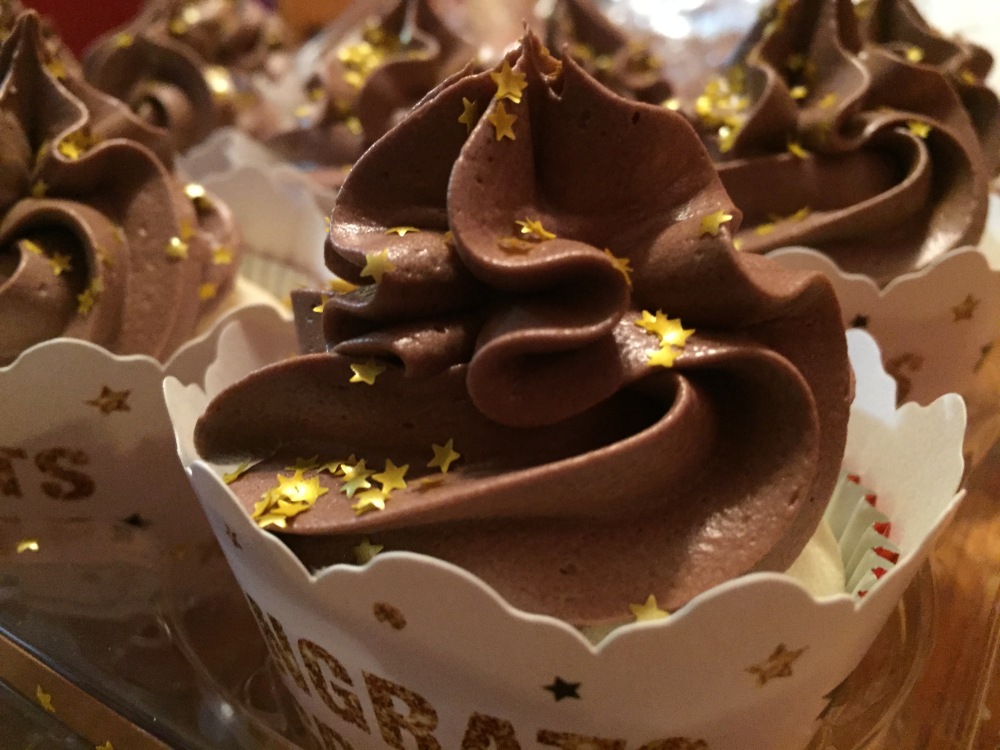
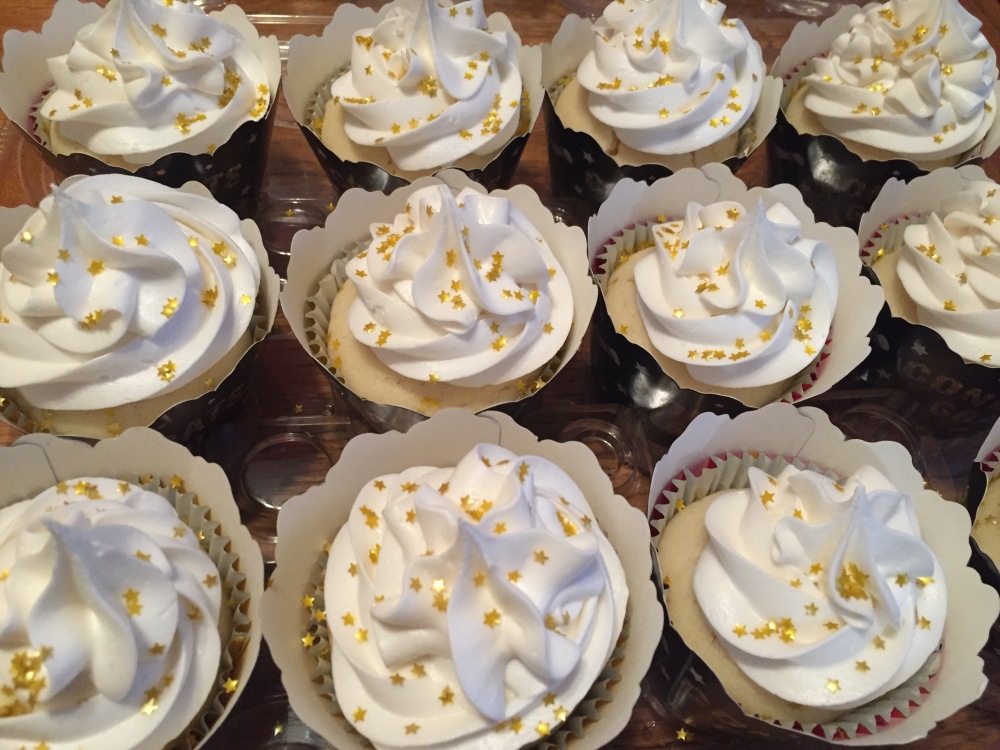
5.) Divide the cupcakes into two batches, with 12 cupcakes each. Using the bag filled with chocolate frosting, pipe a single star directly in the center of each cupcake from the first batch. It should look something like this:
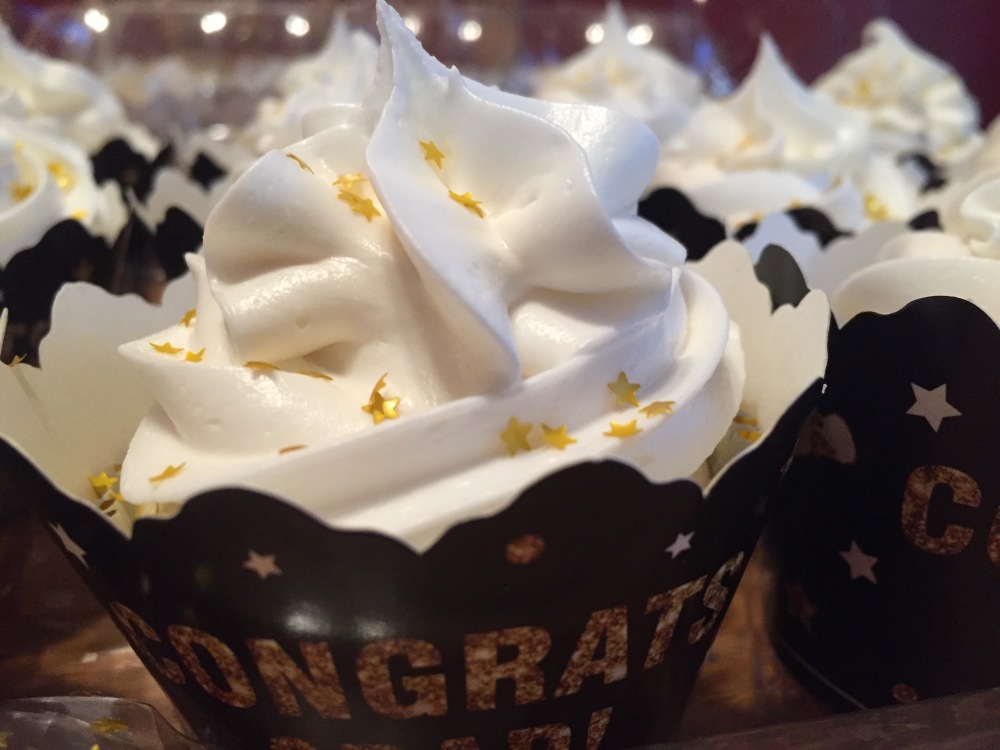
6.) Pipe around the star shape on each cupcake. Start on the outside, and move inwards, then upwards. It should look something like this when it is finished:

7.) Now for the really fun part–sprinkle the edible gold stars on the frosted cupcakes. Do this slowly and carefully, to avoid dropping them in clumps.

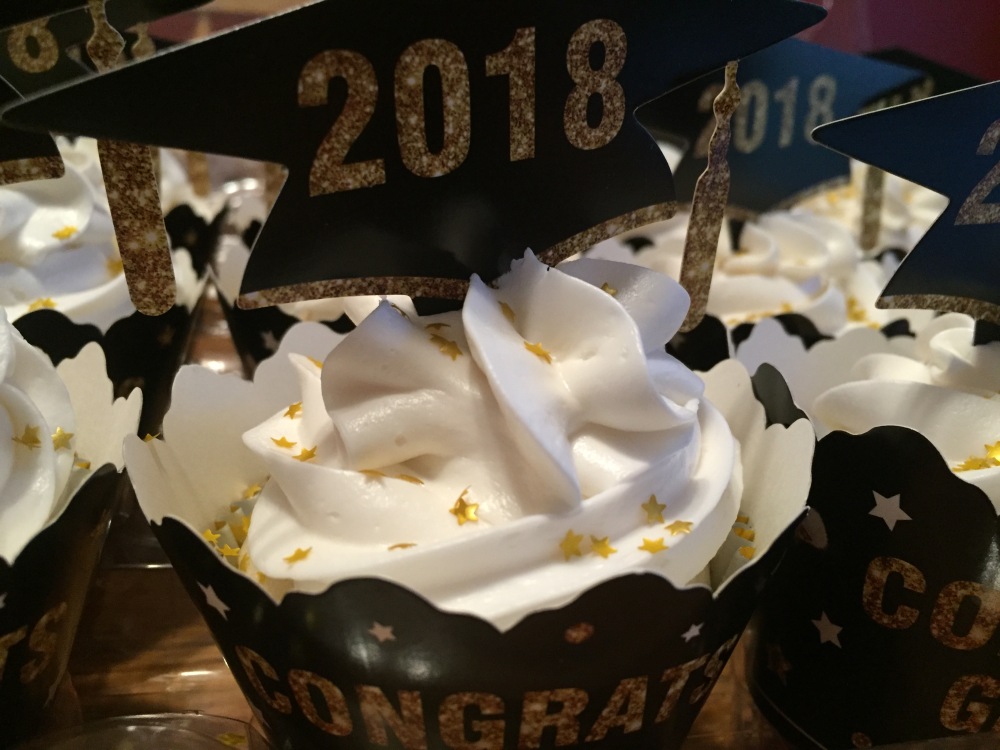
8.) Insert a cupcake pick into the center of each cupcake. Push it down just until the pick is no longer visible. I chose to use all of the diploma cupcake toppers with the chocolate frosted cupcakes, and all of the graduation caps with the white frosted cupcakes. This choice was purely based on my personal aesthetics, though.

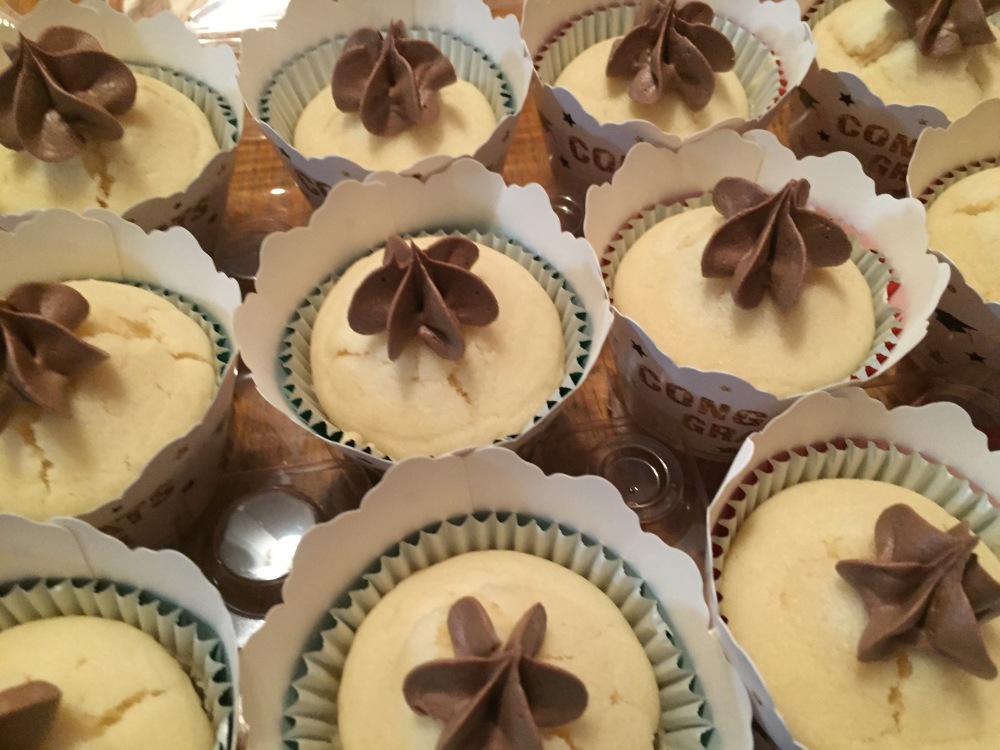
9.) At this point you should be left with 12 unfrosted cupcakes. Using the white frosting, pipe a star in the center of each of these cupcakes.


10.) Pipe your way around the cupcake. Start on the outside, and work your way inward, and upward. When you are finished, it should look something like this:


11.) Sprinkle edible stars over the white frosted cupcakes.
12.) Insert the remaining cupcake toppers into the cupcakes. Enjoy!

For easy transport, I recommend investing in a couple of bakery style disposable cupcake carriers, if you don’t already have something else lined up. You can find them here
I even frosted my cupcakes in these to avoid having to move them after they had been iced! 😊

There you have it—2 dozen beautifully decorated graduation cupcakes, that are also wheat/gluten, dairy, egg, and nut free! I hope you have all enjoyed my first ever cupcake decorating tutorial. Please feel free to share your thoughts in the comment section below. 😊
NOTE: Please check (and double check) any and all labels before you consume a new product if you (or your child) has a food allergy, and if necessary call the relevant manufacturer to confirm that the product is safe for you (or your child) to consume. Please consult your (or your child’s) Dr. before making any dietary changes. While I hope that all of you reading this will find the information I have supplied above to be helpful, this information is not intended to in any way replace, or supersede, the care and advice of your allergist, nutritionist, dietician, or other medical professional.


O I love those cupcake sleeves!
LikeLiked by 1 person
Me too! 💙
Cupcake wrappers are one of my favorite things ever. They are such a simple way to jazz up a cupcake 🙂
LikeLike
Awww, Its so pretty. I am sure I can’t do it but will give it a try.
LikeLiked by 1 person
You might be surprised! It’s way easier than it looks 🙂
If you do try it, be sure to let us know how it goes 🙂
LikeLike
These look so good!!! Can’t wait to try!
LikeLiked by 1 person
Thank you! Be sure to let us know how it goes if you do try them 🙂
LikeLike
These are so cute! I love that you’ve taken the time to make these cupcakes even more special with the addition of themed pattypan surrounds and cake toppers! Even better that this recipe is allergy free! x
LikeLiked by 1 person
Thank you so much, Christie! 🙂
LikeLike
These are so cute! What a great idea to compile allergy friendly recipes. I’m sure a lot of families will find this useful!
LikeLiked by 1 person
Thank you! 💜
LikeLike
You did such a great job! I wish I could decorate my cupcakes this pretty! I love it!
LikeLiked by 1 person
Thank you! You should give it a try sometime! It really is easier than it looks 🙂
LikeLike